
The Visual Learning Advantage
Why infographics, short videos, and authentic product-based assessments outperform text-heavy lessons—and how to build them fast in Canva with resell rights.

If you teach online, you’ve felt the friction.
You write long lesson notes. Students skim. You paste another paragraph. They scroll. You post a reminder. They disappear.
Here’s the hard-earned truth many educators quietly discover: words alone are doing too much work.

The educators who consistently outperform don’t ask text to do everything. They design thinking. They translate core ideas into visual assets—infographics, short videos, frameworks, and product-based assessments that students can use. And then they build a system so the work compounds week after week.
This is an article about that system—how to turn what you already teach into a Visual Asset Flywheel you can build in hours (not months) and then monetize through resell rights so your prep starts paying you back.
The leverage principle most educators miss
Leverage multiplies the output of your effort without multiplying the input. In teaching, the highest leverage is not another hour writing; it’s one asset that teaches clearly, travels across platforms, and keeps teaching when you’re not in the room.
Visuals are leverage for three reasons:
Compression. A strong infographic or 90-second explainer compresses a 1,000-word idea into a single screen. Less cognitive load, more transfer.
Usability. Visuals are easier to reuse in decks, worksheets, LMS pages, social posts, and recorded lessons.
Shareability. Students share what’s easy to grasp at a glance. When they share, your work compounds.
When you stack these assets—the “asset flywheel”—you shift from endless busywork to reusable buildwork.
The Visual Asset Flywheel (3 parts)
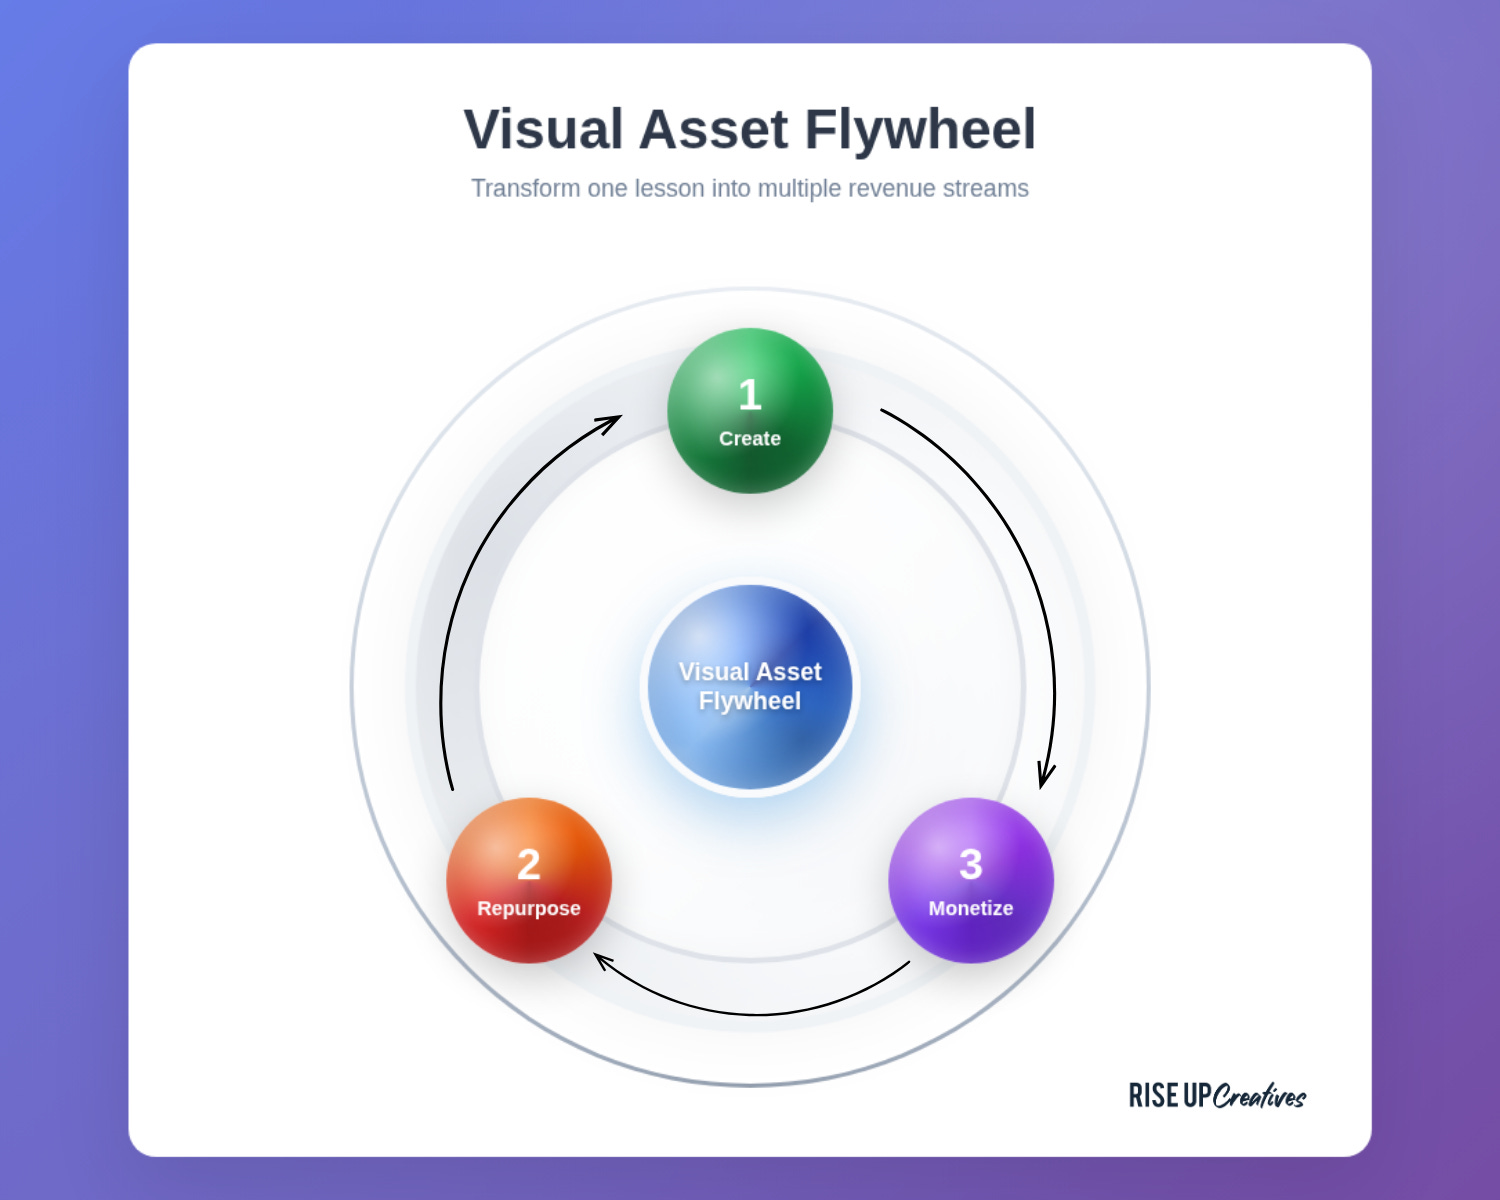
1) Create master assets once.
Start with three: an infographic, a short video, and an authentic task (product-based assessment) for the same lesson. Make them modular and on-brand.
2) Repurpose everywhere.
Resize the infographic for LMS/print/social; embed the video; turn the task into a rubric + checklist. The same lesson now ships across five channels in minutes.
3) Monetize the stack.
Package the assets as a mini-curriculum. With resell rights, you or your buyers can sell the package as a stand-alone micro-course or bundle—turning prep into an income stream.
Canva makes each step fast: brand kits, resize, animation, captioning, record-and-present, collaboration, and ready-made templates. But tools aren’t the point. Systems are.
What to build for each lesson (and why)
1) Infographic (the mental model on a page)
Your goal is to make the invisible structure of the lesson visible. Think: ladder, cycle, map, or decision tree.
🎯 Use case: Pre-teach the big picture; review at the end; include in downloads.
⚙️ Build: Choose a visual pattern (e.g., “4-Step Loop”), drop in your key verbs, add a one-line definition per step.
🔁 Repurpose: Social post, slide, printable, LMS banner, lesson thumbnail.
2) Short video (90–120 seconds)
Students don’t need a 20-minute monologue. They need a crisp, energetic overview that hooks attention and primes practice.
🎯 Use case: Lesson opener, weekly announcement, assignment brief.
⚙️ Build: Use a 4-beat script: Hook → Why it matters → The 3 steps → What to do now. Record with Present & Record; overlay captions; export vertical and horizontal versions.
🔁 Repurpose: LMS embed, YouTube unlisted, social teaser, email nudge.
3) Product-based assessment (authentic task)
Instead of asking, “Did you read?”, ask, “Can you make?”. Have students produce a simple artifact that demonstrates understanding (e.g., a one-page process map, a slide explaining a concept, a 60-second demo).
🎯 Use case: Assessment that resists cheating and encourages application.
⚙️ Build: Provide a template + rubric. Grade the thinking (clarity, accuracy, relevance), not the art.
🔁 Repurpose: Showcase anonymized exemplars, build a class gallery, reuse the best as teaching aids next term.
The result: your lesson becomes a kit—a tight package that teaches, practices, and proves learning.
Why this outperforms text-heavy lessons
Clarity: Visuals reduce extraneous load. Students see the structure before details.
Memory: Spatial and image cues create more retrieval hooks than plain text.
Speed: You can review an infographic in 10 seconds. That matters when attention is scarce.
Action: Product-based assessment pushes learners from “knowing about” to “doing with.”
Equity: Clear visuals, captions, and alt text support more learners.
This isn’t “pretty.” It’s pedagogy with leverage.
A one-week plan to build your first flywheel in Canva

Day 1 — Pick one lesson that matters.
Choose something evergreen. Name the transformation in one sentence: “After this, students can ___.”
Day 2 — Draft the framework.
Sketch the lesson’s 3–5 core steps. Think shapes: ladder, loop, grid, map. Don’t design yet—clarify the logic.
Day 3 — Build the infographic.
Open Canva → search “infographic” → pick a clean layout. Drop your steps, add one icon per step, and a single sentence for each. Activate your Brand Kit so fonts/colors stay consistent.
Day 4 — Record the short video.
Write the 4-beat script. Use Canva’s Present & Record or screen record. Add captioning. Export horizontal (LMS) and vertical (social). Title = benefit, not topic.
Day 5 — Create the authentic task.
Duplicate your infographic file and convert it into a student template with greyed labels. Write a three-line brief and a 5-point rubric. Add alt text to any non-decorative images.
Day 6 — Repurpose & publish.
Use Magic Resize to generate sizes for LMS, IG, FB, YouTube thumbnail, and A4 print. Upload to your LMS, schedule social, email the video and infographic with one-line instructions.
Day 7 — Debrief & document.
What took time? What was effortless? Add notes to your Process Library so next week is faster.
Do that once, and you’ll never approach prep the same way again.
Resell rights: the educator’s monetization lever
You already did the work. Resell rights turn it into an asset.
MRR (Master Resell Rights): You can sell the course as-is, and your buyers can resell it too (under the original brand).
PLR (Private Label Rights): You can rebrand and modify the content, sell it under your name, and optionally grant rights to your buyers.
How to use resell rights ethically and effectively:
🧭 Start with fit. Package micro-curricula that you personally use. Your credibility is the differentiator.
✍️ Add your signature. Even with PLR, don’t copy-paste. Add examples, stories, rubrics, and checklists from your classroom.
📦 Bundle for outcomes. Sell stacks—infographic + slides + video + template + rubric—not just one file.
📜 Clarify license. State what buyers can/can’t do (edit, rebrand, resell, pass along). Simplicity wins.
🔁 Update quarterly. Tiny updates keep the offer current and protect your reputation.
Done right, resell rights shift you from “paid per hour” to “paid per asset”—without abandoning teaching.
A simple ROI snapshot
Let’s say the old way costs you 6 hours to prep a lesson. The visual flywheel takes 3 focused hours the first time (you’re using templates), then 45 minutes to repurpose each week. If that saves 3–4 hours per lesson across 12 core lessons, you’ve bought back a week or more each term.
Package those same 12 lessons into a micro-course and sell 30 copies at a modest price point. That’s income that doesn’t require another live hour, plus reach beyond your classroom.
This is not theory. It’s the quiet math of leverage.
The Canva workflow I recommend (fast + scalable)
🧰 Brand Kit: Lock fonts, colors, logos. Consistency = authority.
🧩 Template stack: Save your favorite infographic, slide master, worksheet, and thumbnail as brand templates so you can duplicate and go.
🧑🤝🧑 Collaboration: Comment threads for TAs/peer reviewers; version control stays inside Canva.
🧏 Accessibility: Add alt text, check color contrast, include captions on videos, and avoid text baked into images when possible.
🔁 Magic Resize/Switch: Create once, export many.
🎬 Present & Record: Record explainers without leaving the editor.
🗂️ Foldering: One folder per course → subfolders for Infographics, Videos, Assessments, Promo. Your future self will thank you.
Common pitfalls (and how to avoid them)
Over-designing. Fancy kills clarity. Use one typeface for headings, one for body, and ample white space.
Too much text in visuals. If you need paragraphs, it’s not an infographic—it’s a PDF. Distill first.
No rubric. Product-based assessments fail without clear criteria. Grade the thinking, not the decoration.
Inconsistent assets. Without a Brand Kit, everything looks random. Set the kit once.
No publishing rhythm. Assets only compound when you publish on a schedule. Protect one “asset hour” on your calendar each week.
Ship this week: a 5-asset starter pack
Infographic: “The 4-Step Loop” of your lesson.
Short video: 90-second primer with captions.
Template: Student file with placeholders.
Rubric: Five criteria, one line each.
Promo trio: Square post, slide cover, YouTube thumbnail.
That’s your first flywheel. Next week: repeat for lesson #2. After four weeks, package them into a micro-course.
Experiments to run (choose one)
🧪 The “Explain Like I’m New” Challenge: Give your infographic to someone outside your field for 30 seconds. Ask them to repeat the main idea. If they can’t, simplify.
🧪 The “One Take” Video: Record your 90-second lesson intro in a single take. Publish even if it isn’t perfect. Useful beats perfect.
🧪 The “Gallery Walk” Assessment: Students submit one slide of their artifact. Run a 10-minute gallery review where peers call out what’s clear and what’s missing.
Each experiment creates feedback loops. Feedback loops create compounding assets. Compounding assets create time, impact, and income.
The bigger game: teach once, earn twice
The best educators don’t just teach. They build. Every week, they add one asset to a growing library. Over time, that library becomes a body of work that travels without them and pays them back.
Visuals aren’t decoration. They’re the interface to your ideas. Resell rights aren’t a gimmick. They’re how your ideas keep teaching beyond your classroom.
Start with one lesson. Build the flywheel. Publish the stack. Then do it again.
Want the templates and a done-for-you path?
If you want a head start, I’ve packaged a Canva Crash Course (with Resell Rights) that includes step-by-step video tutorials (watch + click along), a ready-to-use brand + slide system, and an Edit-to-Resell pack with PLR/MRR licences—so you can set up fast, publish clean, and resell legally to fund your work.
Move now:
Get the course: Canva Crash Course (MRR/PLR) — grow with ease, let your work compound into rhythm
Get found: Create your expert profile on 1on1.today and start booking students — Global Tutor Resource Sharing Platform
Want it done for you or with heavy lifting? Book a 45-minute consult and we’ll spec, design, and launch the stack with you. Book by sending email to Connect@MasterCoachA.Com
Teach once. Earn twice. Let your best ideas travel farther than your calendar.
“Teach once, earn twice! Start with one lesson. Build the flywheel. Publish the stack. Then do it again.”
Love this!!!💚 Thank you so much, Master Coach A!!!
Teach Once, earn twice.
Thank you Master Coach A for this opportunity!!!